CLAY BAR FOR CAR DETAILING - HOW TO CLAY BAR YOUR CAR
Car enthusiasts and professional detailers understand the importance of maintaining a vehicle's appearance. One essential tool in achieving a showroom-quality finish is the clay bar. In this article, we will explore the purpose of a clay bar, the different types available, and provide a step-by-step guide on how to use a clay bar effectively to rejuvenate your car's exterior.
The Purpose of a Clay Bar
1. Removing Contaminants: Over time, a car's paint surface accumulates contaminants such as road grime, tar, tree sap, industrial fallout, and even brake dust. These contaminants can mar the finish of your car and make it feel rough to the touch. A clay bar is designed to lift these stubborn contaminants, leaving your car's paint smooth and clean.
2. Restoring Smoothness: A clay bar works by gently abrading the surface of the paint, effectively removing any bonded contaminants. This process not only restores a smooth finish but also prepares the paint for waxing or polishing, ensuring that these products adhere properly and produce a glossy shine.
3. Enhancing Gloss: Clay barring your car can enhance the paint's gloss and depth by eliminating the contaminants that obscure the true color and shine of the vehicle. This makes your car look newer and more appealing.
Different Types of Clay Bars
When it comes to clay bars, you have a few options to choose from:
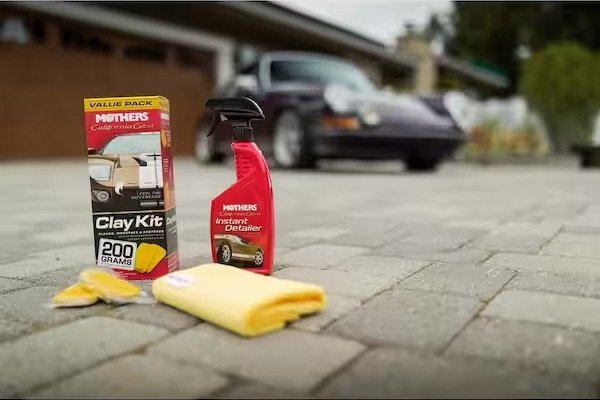
1. Clay Bar Kits: These kits typically include a clay bar, a lubricant spray, and sometimes a microfiber cloth. They are an excellent choice for beginners because they provide all the necessary components for a successful clay bar treatment.
2. Mild, Medium, and Heavy Duty Bars: Clay bars come in various levels of aggressiveness, often categorized as mild, medium, or heavy-duty. The choice depends on the level of contamination on your car's surface. Mild clay bars are suitable for light contamination, while heavy-duty bars are best for deeply embedded contaminants. It's important to choose the right grade to avoid damaging your paint.
3. Synthetic vs. Natural Clay: Traditional clay bars are made from natural materials and are effective but can be messy and require more maintenance. Synthetic clay alternatives, like nanoskin pads, offer a more user-friendly experience with less mess.
Our top 3 clay bar kits
RATING 5/5 ★★★★★
Mothers California Gold Clay Bar System for Car Detailing
Removes embedded grains of metal, tree sap, airborne environmental deposits and paint overspray for "new" look Safe to use on paint Includes 2 clay bars, Showtime Instant Detailer, Microfiber towel.
RATING 5/5 ★★★★★
Meguiar's Hybrid Ceramic Synthetic Clay Kit including Hybrid Ceramic Detailer
EXTREME WATER BEADING and enhanced slickness and shine SMOOTH-AS-GLASS finish while protecting paint in just one-step
RATING 5/5 ★★★★★
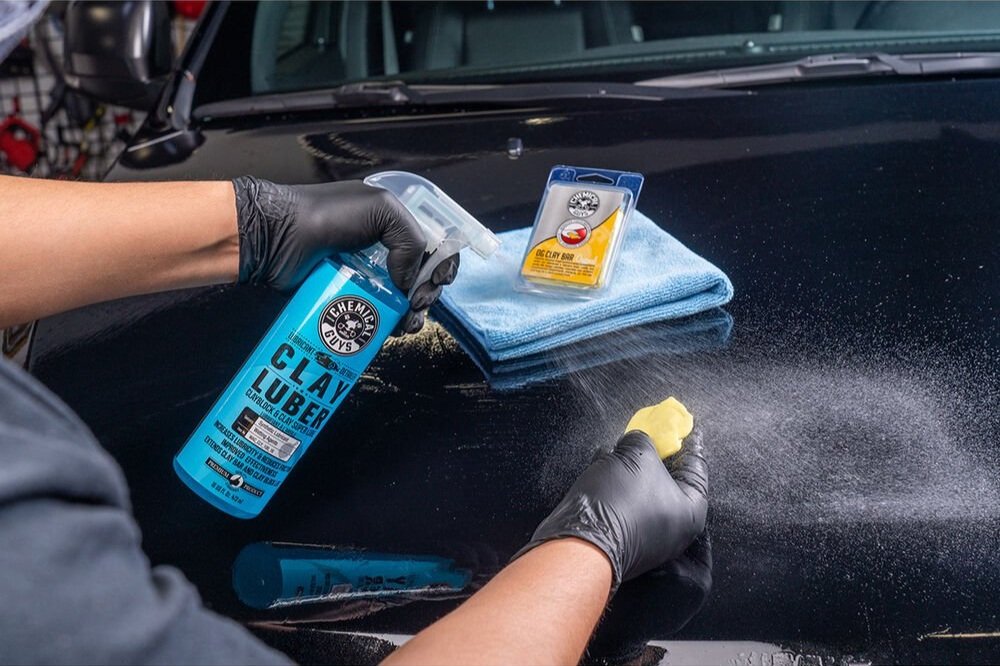
Chemical Guys OG Clay Bar & Lubber Synthetic Lubricant Kit
SUPER SLIPPERY SURFACE - Use the OG Clay Bar Kit to create an ultra-slippery surface for your clay bar, ensuring effective removal of embedded contaminants.
A Step-By-Step Guide on How to Use a Clay Bar
Step 1: Gather Your Materials
Before you begin, make sure you have the following items ready:
Clay bar
Lubricant spray
Microfiber towels
Car washing supplies (bucket, soap, mitt)
Optional: car wax or polish for finishing
Step 2: Wash Your Car
Start by washing your car thoroughly using car wash soap. This will remove loose dirt and debris from the surface.
Step 3: Prepare the Clay Bar
Knead the clay bar into a flat, palm-sized shape, making it easy to work with.
Step 4: Lubricate the Surface
Spray the lubricant onto a small section of your car, ensuring the surface is well-lubricated. This will allow the clay bar to glide smoothly without scratching the paint.
Step 5: Clay the Surface
Gently glide the clay bar back and forth over the lubricated section. Apply minimal pressure; the clay will do the work. You will feel the clay picking up contaminants. Fold the clay to a clean section when it becomes dirty to prevent scratching.
Step 6: Wipe Clean
Use a microfiber towel to wipe off any residue left by the clay. Your paint should feel significantly smoother.
Step 7: Repeat
Continue these steps, working on one section at a time, until you've clayed the entire car.
Step 8: Finish and Protect
Once you've clayed the car, you can apply wax or polish to further enhance the shine and protection of the paint.
Using a clay bar on your car can be a rewarding experience, resulting in a smooth and glossy finish that will turn heads. By following this guide, you can achieve professional-level results and maintain the beauty and integrity of your vehicle's paint for years to come. So, invest some time and effort into clay barring your car, and enjoy the results of a job well done.


